
In today’s review, and with huge excitement, I aim to show you literally everything about the Xiaomi Mi Drone.
It is likely the best drone for aerial photography currently on the market, so let’s see all the reasons for such a statement in this full Xiaomi Mi Drone 4K review.
It’s always been one of my biggest dreams to have my own drone. It is well in-line with my thinking that “there is nothing more fascinating than flying!” Nowadays, many manufacturers have given us the chance to follow such dreams with this new Unmanned Aerial Vehicle (UAV) aircraft that we simply, and wrongly, call “drones.” There are many machines of this type on the market: big, small, tiny, short, fast, fat, heavy, light, with cameras, with multiple motors, with and without lights, based on airplane or helicopter principles, etc…
The choice is already huge and continues to become overwhelming. Today we will study one of the best buy drones, the Xiaomi Mi 4k drone or better called a quadcopter. A quadcopter UAV is simply a drone with four propellers.
This drone has a remotely controlled camera that is capable of recording video footage in 4K resolution, which manages to capture every fine detail of the landscape below. Using the long-reaching Remote Controller you are free to fly as far as 5km (3.1 miles) away, having the opportunity to explore places you have never explored before!
Before I start with the review, let me warn you that every country has its own laws about remotely controlled flying machines, and not every country allows them. I also want to seriously state that you should never operate them in places where it might present danger to anything and anyone!
Absolutely avoid flying your drone over, around, or near airports, big cities, densely populated areas and/or events, and along the highways… in short, do not fly at places where it might be potentially dangerous for you and for other people.
That being said, we can launch our drone review!
| Drone | Xiaomi MI 4K |
| Flying Accuracy | +- 0.1m/3.9in |
| Max Ascending Speed | 6m/s – 19.68ft/s |
| Max Descending Speed | 1.5m/s – 4.9ft/s |
| Max Cruising Speed | 18m/s – 59ft/s |
| Height Limit | 500m/1640ft Auto Limited |
| Remote Controller Distance | 2km/1.25miles |
| Propellers | 4 with 25cm rotation diameter |
| Remote Controlled Camera | Yes |
| Camera Movement | Up/Down From 0 to -90° |
| Field of View | 94° |
| Aperture | F/2.8 |
| Video Resolution | 4K 30fps / 2.5K 30fps / 1080P 100/60/30fps |
| Photo Resolution | 16Mp (4000×3000) |
| Image Format | Jpeg |
| Video Format | H.264 |
| Batery | 5100mAh |
| Weight | 1400g/3.1lbs |
Unboxing and accessories
In the box there is:
- 1x Xiaomi Mi Drone 4K
- 1x RC controller
- 1x Camera
- 1x Battery
- 1x USB cable
- 2x Manuals
- 8x Propellers
- 1x Wall charger
Here’s the video.
About the Xiaomi Mi Drone
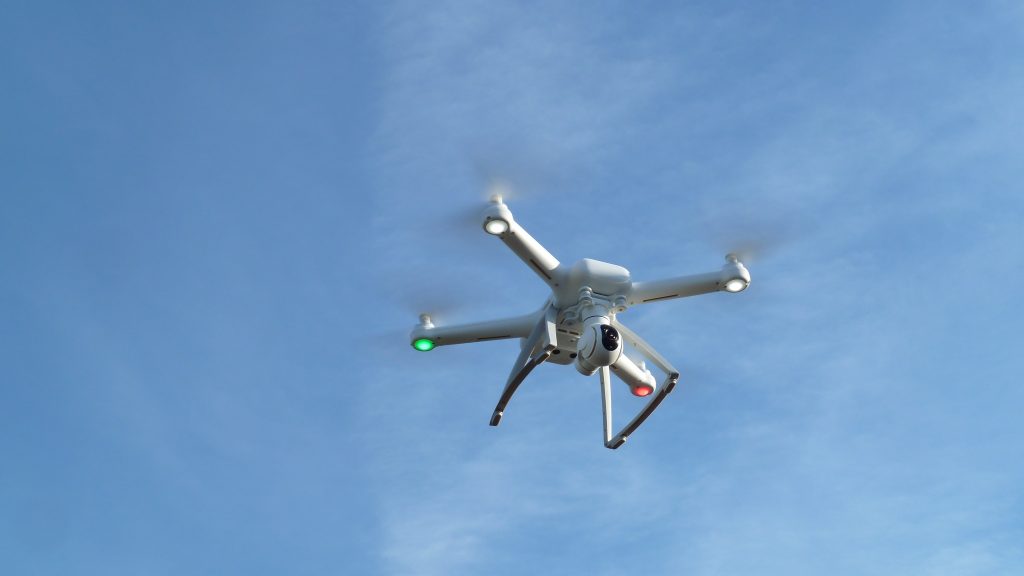
I’d be lying if I told you that this drone is ugly. It is made of white plastic with golden details. The plastic appears fragile to the look and touch, but it is actually quite strong and also very light. I like the two-tone white/gold design, it makes the Xiaomi Mi drone look pretty classy!
On the crossform shape of the drone we first see the 4 propellers fixed to the motors at the end of drone’s arms. Under the motor pods we have 4 different LED lights. The two white lights denote the front part of the drone, while the red and green LEDs on the back motor undersides act as navigation lights. These navigation lights are used in the same manner as on boats and planes: Green to starboard (right side), Red to port (left side).

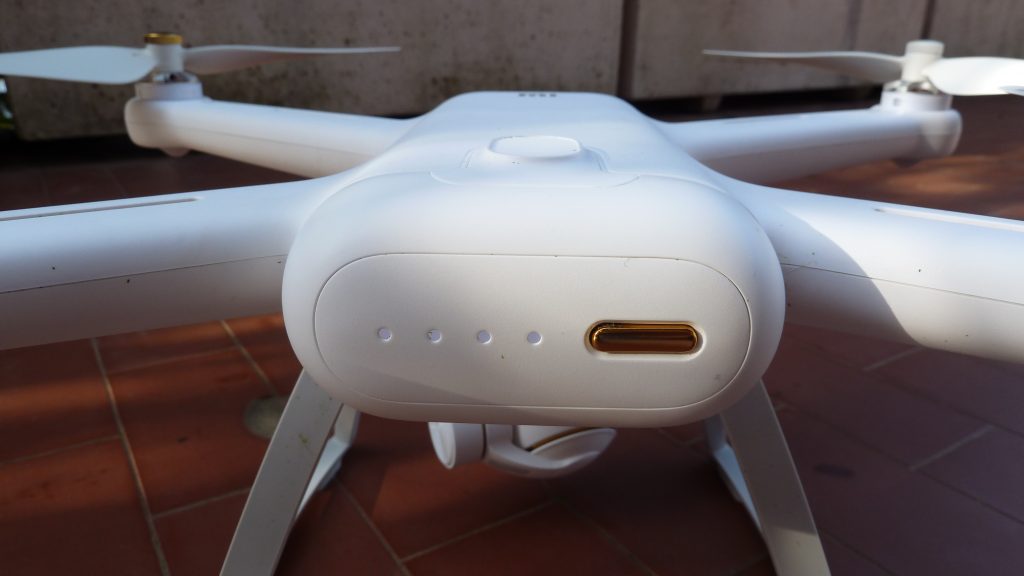
On the backside of the drone we find the battery with its gold button and 4 LEDs that form the battery status indicator. Very useful to know the status of the battery; also when it is detached from the Drone.
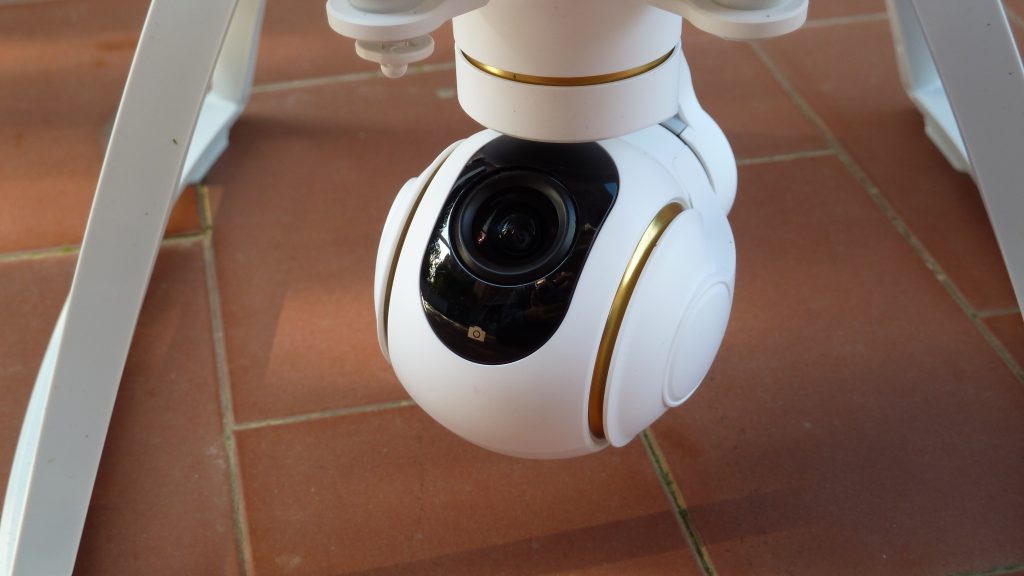
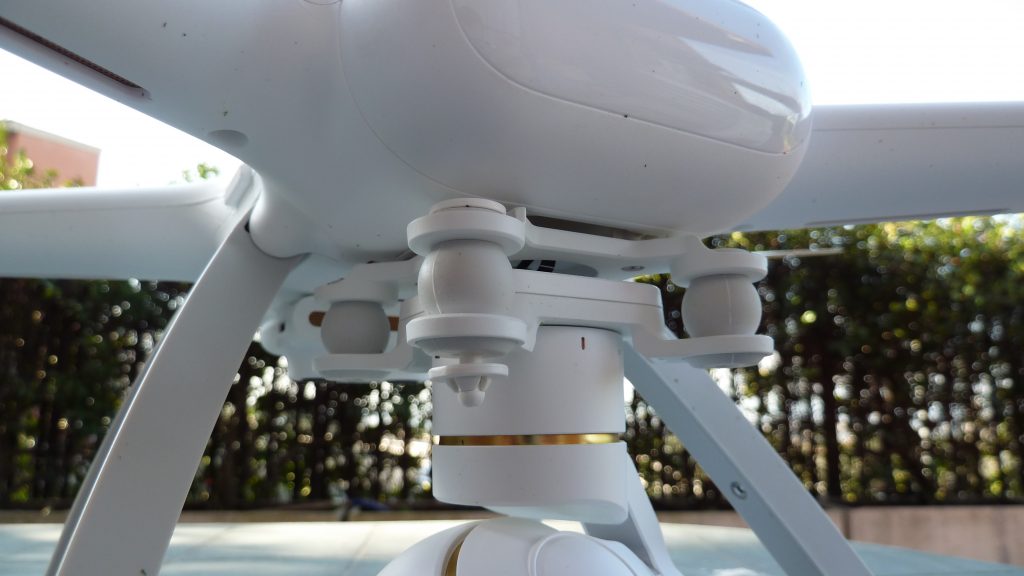
Under the front side of the drone hangs the camera, like a huge eyeball, easily noticeable. Thanks to the camera mount which is composed of 2 plastic frames separated by 4 soft round rubber shock-absorbers, plus a 3-axis stabilizing system, this drone has one of the best stabilized cameras currently on the market.
The GIF below shows the xiaomi mi drone 4k’s camera in action.

There is the usual landing gear on the drone underside; shaped like two plastic triangles positioned aside of the camera. The landing gear is not fixed, rather it can be folded by two dedicated buttons located on the “hips” of the drone. By folding the landing gear up, the drone becomes flat, and thus more portable.

The last thing I want to mention are the three strange “things” on the bottom of the drone. What are those? Well, the two larger circles are the Sonar Mechanism’s and the smaller one is another small camera; the synergy of these two features allows the drone to land safely. And drone will land at the same place where it took off. We will go deeper into more details later in the review.

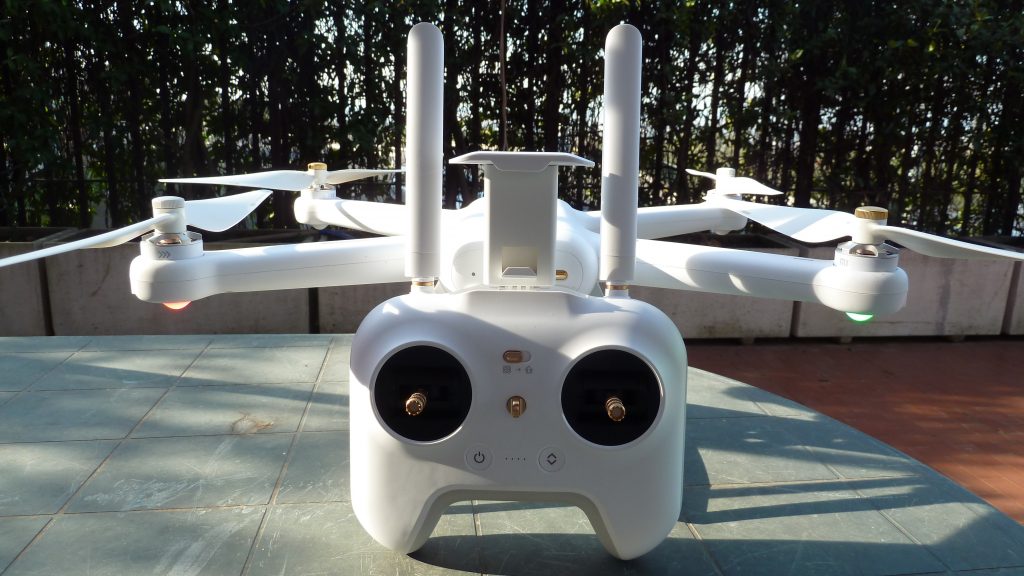
The Remote Control
An important part of the whole experience is the drone’s Remote Controller, or simply RC. It is a quite big and heavy contraption, but there are a few strategically placed rubber strips to help with the grip.
The two main levers are big, offer perfect grip and reveal that they are a very precise mechanism. If you perhaps don’t like the levers you can change them since they are simply screwed onto the RC commands.
On the front of the RC there are:
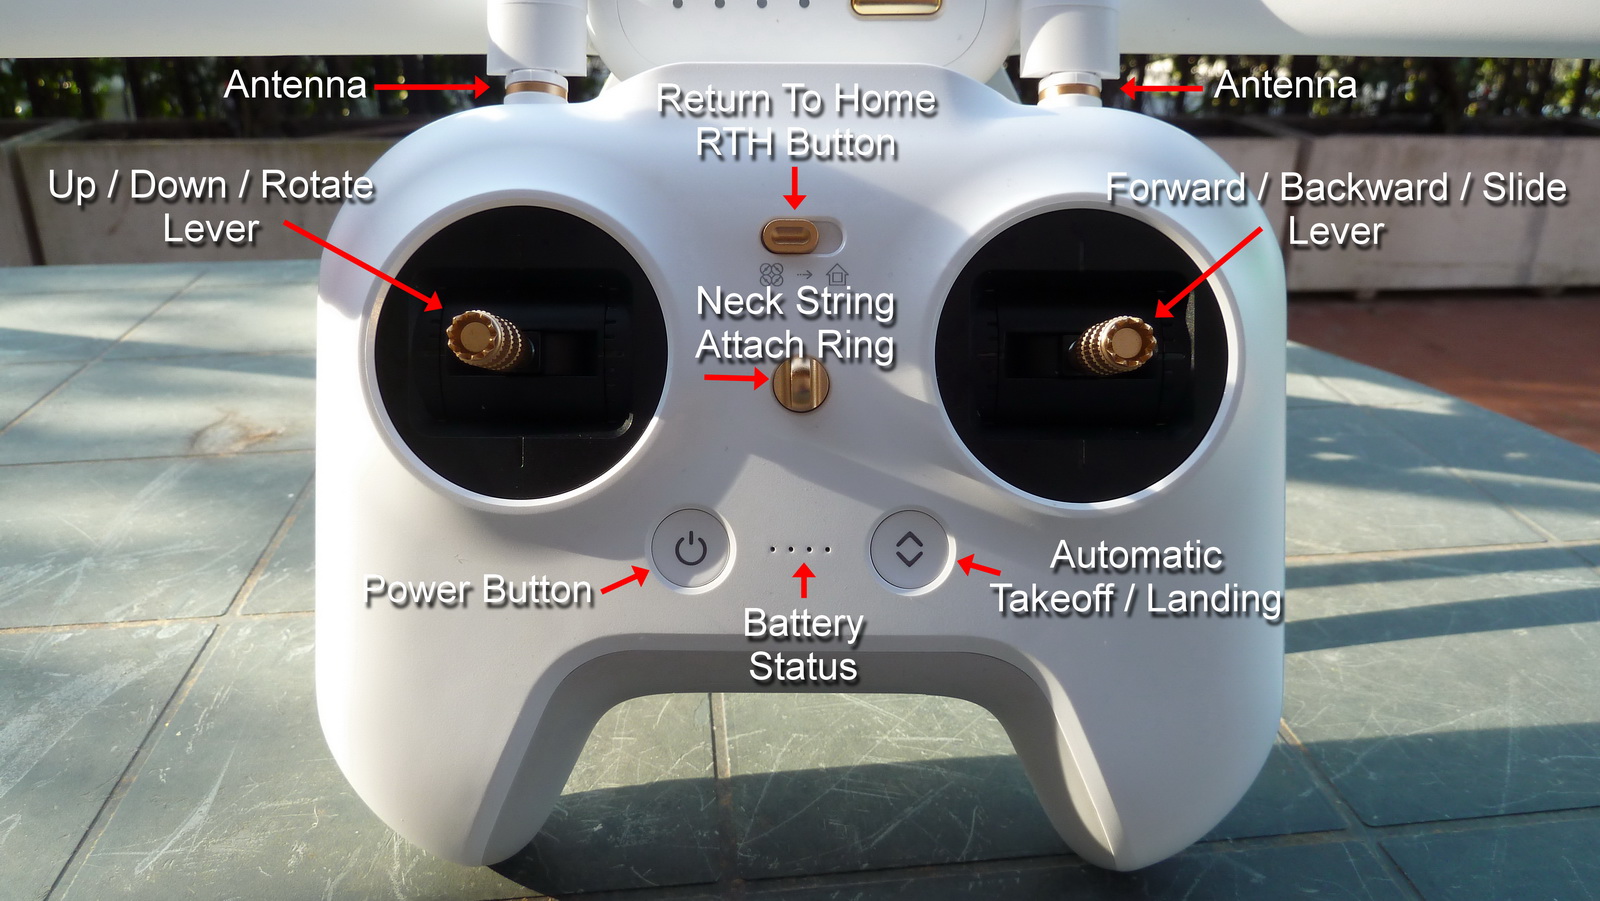
The left lever is to control the elevation of the drone (up/down) and the angle (turn about itself left/right);
The right lever function is to move the drone (forward/backward and slide left/right).
The two big buttons are the Power Button and the Automatic landing/take off command.
In the middle there is the battery status indicators of the RC and a ring to support the unit via a neck strap.
Above that there is the Return To Home (RTH) button, its function is self-explanatory: bring the drone back from wherever it is.

On the front corners we see another two wheels. The left one is used to control the camera tilt from 0° to -90°. The right wheel is programmable, and can be used to modify the drone LED intensity, or the cam’s EV (exposure value) during the flight.
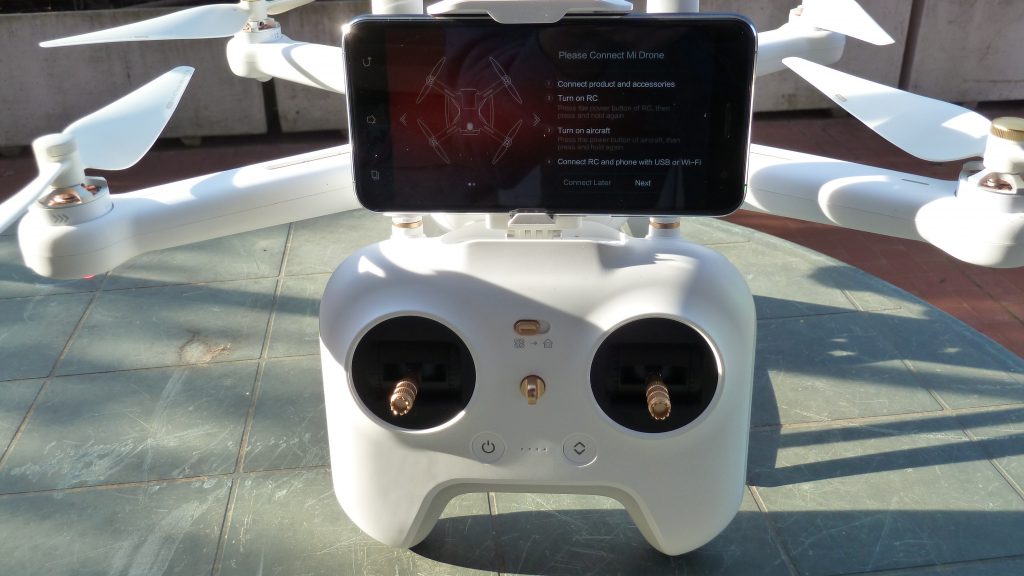
At the front top, and extendable from the inside of the RC housing, there is the smartphone support clamp.
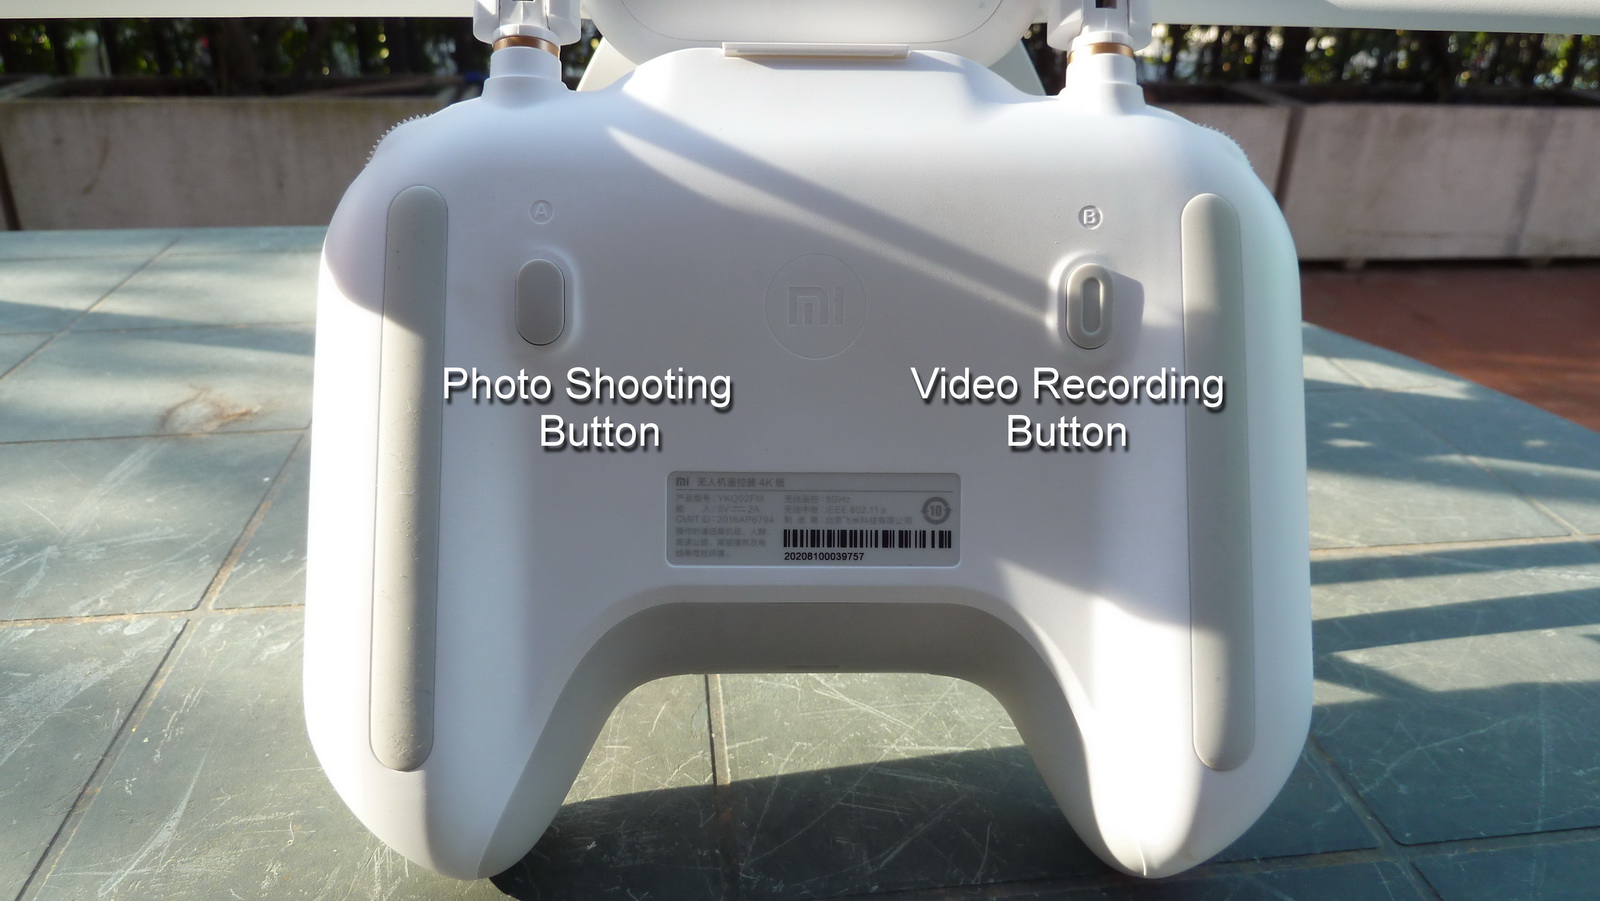
On the backside there are two buttons. With the left hand we remotely start or stop the video, and with the right we can shoot photos. These functions do not work simultaneously.
[go_pricing id=”anet_a8_5a_5a775b3351a3e”]
The Best Drone with a Camera
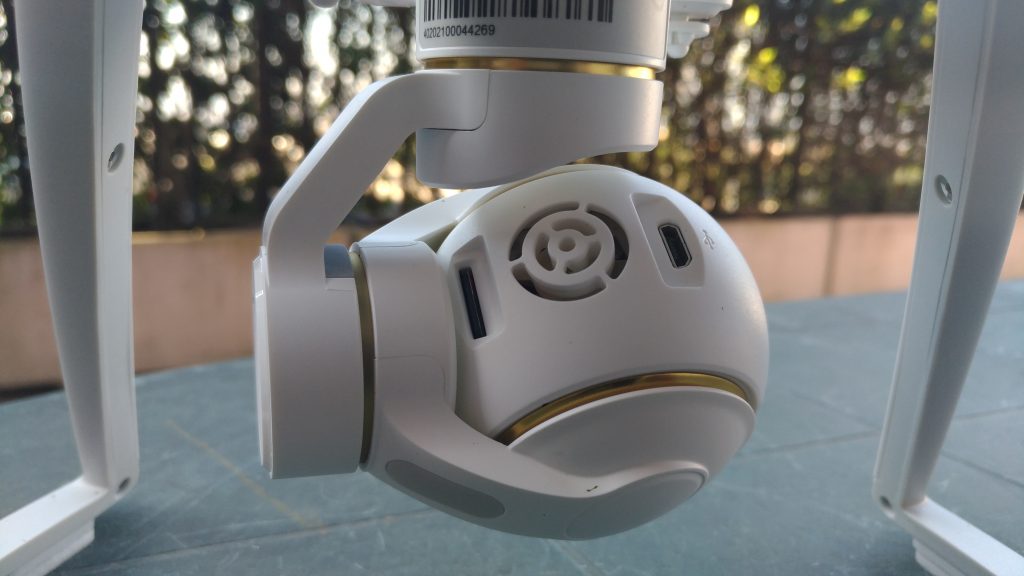
We think this may be the best drone with a camera! The camera has the usual shape of a 3-axis gimbal, but it is further shielded from vibrations by 4 soft rubber balls. Xiaomi declares that this simple mechanism is able to annul more than 1000 shakes per second. There’s no possibility to count these vibrations, but the smooth work of the camera is very impressive.
On the back of the camera is a small heat dissipation fan which helps the camera stay cool. At the sides of the fan are the USB port and SD card slot. The frontally placed lens gathers images in 100° FOV.
How To Setup The Xiaomi Mi Drone 4K Before Flight
In order to successfully fly the drone, you must be sure to have everything you need! It’s not as self-evident as you might think, because the first time I forgot to take along the Remote Controller! But I’m not the only one like that, right? Later I solved this by taking the entire drone box with me.
The most important step is to ensure that all the batteries and spares for the remote controller and drone are fully charged, ditto your phone. After that we are ready to go out and complete the drone setup by following these steps:
- Take the drone out of the box, and fold the landing gear down till the locking buttons click into place. The gear might look broken when unlocked, but in actuality it is not. Make sure the gear is locked by lightly pushing on it, if the gear doesn’t move then it’s OK.
- Ok, now’s the time to mount the camera. Before doing anything, we need to detach the small door from the drone underside to expose the camera contacts. Don’t try to pull the door open with your nails because it is near impossible. Instead, lay the drone on a smooth surface and push the the lock mechanism (nearest button). The door will fall open by itself. Now, without taking off the 4 white cubes around the motors, turn the drone over and mount the camera with the lens turned towards you. It’s an easy mechanism, no muscle required. Mount the front side first, then the back, until you hear a click. As always, test the connection. Try to pull out the camera, and if it won’t budge, then everything’s well.

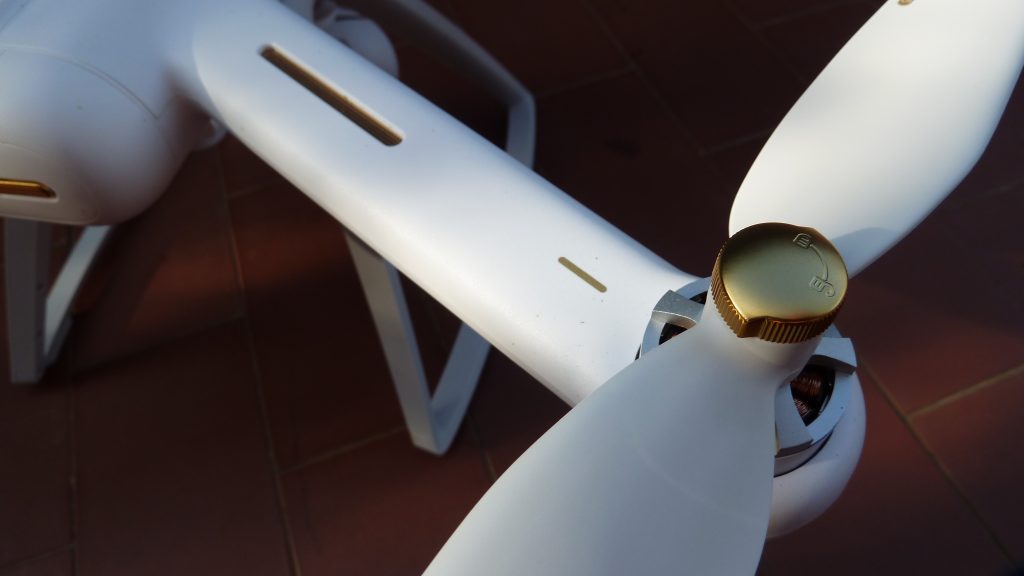
- The last pre-flight step is obviously, to mount the propellers. These are in different colors; two silver and two gold. You can see this by the color of their plastic mounts, and these are to be mounted in accordance to the color of respective arms. You just slighty press the propeller to the top on its motor until it sits on the axle, and then turn the propeller in the indicated locking direction. Also, after any mounting action, try lifting the drone by the propellers to test the mount. If everything stays attached, it’s OK.

I want to remind you that drones, upon encountering any problem can’t just be stopped like some ground vehicle. Drones fall down and are likely to cause hurt or damage below. So do not ever take off before being absolutely sure everything has been mounted correctly. It is a mandatory procedure for all aircraft of any type, whether manually or remotely piloted!
Drone is assembled, so it’s time to concentrate upon the phone and the Remote Control.
- Turn on the Remote Control by pressing twice on the power button: the first press fast and the second one for two seconds. When you hear the beeps and see the lights, it’s turned on.

- The last step is to put the phone on the RC. All you need to do is pull out the phone support from the front of the Remote Control and connect the phone to the RC via Wifi or Cable. I advise you to use the cable because it is safer (connection can’t be lost) and you will use less battery power.

As you can see, this drone was made to be an “easy to use” product. There are just a few procedural steps to follow, but everything is straightforward. All the mechanics are very sharp and nothing seems sluggish or cheap. When everything is assembled, the drone is very strong and well made. There is absolutely nothing to make you think of sloppy manufacturing. Exactly the opposite – the Xiaomi Mi Drone exemplifies stability in every aspect.
Now that we know how all the pieces are put together, we are ready to fly the drone!
First steps
I want to start this part by taking a little step back to establish relation with the previous section, then:
- Turn on the RC
- Turn on the Drone by pressing the power button with two clicks. The first fast, the second click two seconds long (like the RC)
- Turn on the App
- Connect the phone to the RC
- Follow the instructions from the app to pair the drone with the RC
- Now the drone and the RC are perfectly connected
If everything went well, you will now see either the drone position on the map, or what the camera is seeing.
All you need to do to is wait for the “Could fly” signal from the app to turn on the motors.
You power on the motors by simultaneously pushing the left lever on the RC to its lower right corner, and the right lever to the lower left corner.
The drone never gave me the green light a.k.a. “OK to fly” the first time. To “fix” this problem you simply move the drone just 1m (3 ft) up and rotate it. Usually this is enough to ensure proper calibration which allows you to fly. I don’t understand what the problem is, maybe it’s just that the compass requires calibration, because after the first takeoff the GPS signal is perfect.
I made this little video of what you have to do from start to finish before flight:
Video From the “Best Buy Drone”
The videos taken from the Xiaomi Mi drone are simply gorgeous! With its 4K resolution, the camera manages to capture every single detail on the ground. As opposed to the action cam reviews, I will use the maximum resolution possible, as the job of any drone is to help make spectacular cinematic videos.
My first flights went well and I was quite amused by the colors. I was in a field and the grass was more grey than green…
Once home, I studied the app and fixed this by increasing the saturation and contrast. I increased the saturation from 0 to 50 and the contrast from 0 to 13. I’d recommend you experiment with this for better video quality.
Also the light changes are perfect, even with backlight conditions!
After several flights, I made two short montages. The first one uses standard color settings, which shows that the colors are quite bleak:
In this one, I changed the color settings so everything has a more natural look:
I swear I only added the music and nothing more; these videos are directly from the drone!
During these videos I noticed that the gimbal is a bit awry, nothing major but there is almost 3° of imprecision. You can notice this when looking at the horizon line, it’s not perfectly straight. I read on internet that this is a common problem for the Xiaomi Mi. I couldn’t find the way to level it, but if I do I’ll update the review.
After few time i made other montages, and i want to show you them:
Photo, Best Drone To Buy?
The photos provoked the same thoughts as the videos. These had the same anemic colors, but are quite sharp nevertheless. Obviously not DSLR quality images, but great anyway!
Noise
I can ensure you that this drone is not one of the most quiet drones on the market!
App
The app for the Xiaomi Mi Drone is designed very, very well. It simulates your presence in the cockpit of an aircraft, in the know with all the parameters.
Let’s explain all the information on the screen!

In the top left corner there is the altitude (relative to the takeoff point, not from the sea level).
In the top right corner there is the drone battery power percentage.
In the lower left corner there is the drone distance from the RC.
In the lower right corner is the number of satellites the drone is reading its data from.
After that, from top to bottom, we have:

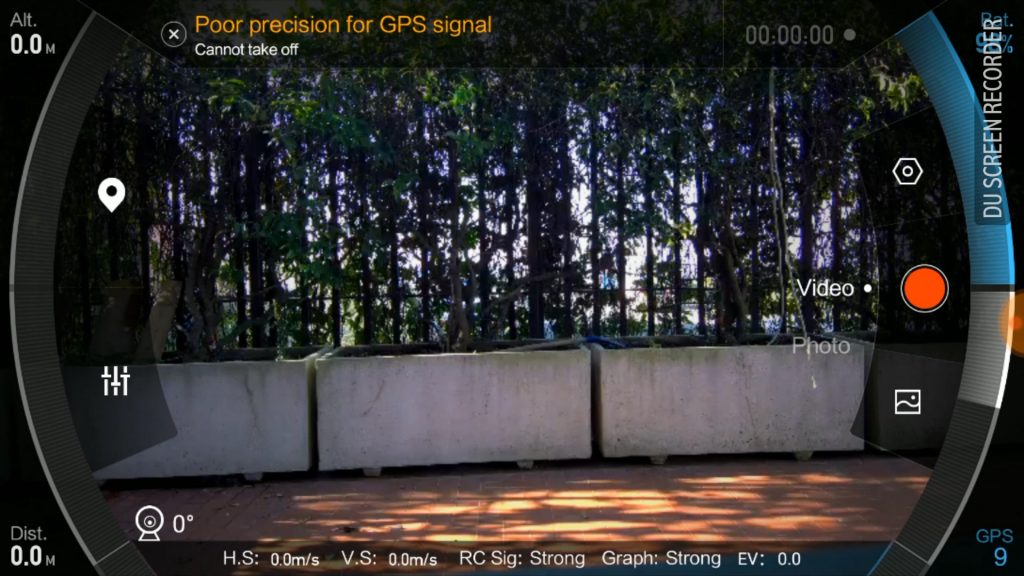
The GPS status and various warnings.
The video recording timer.
On the bottom of the screen is the angle of the camera, and other various parameters: H.S is the horizontal speed of the drone, V.S is the vertical speed, the RC signal (in this case: Strong), the video transmission quality, and the EV of the camera.
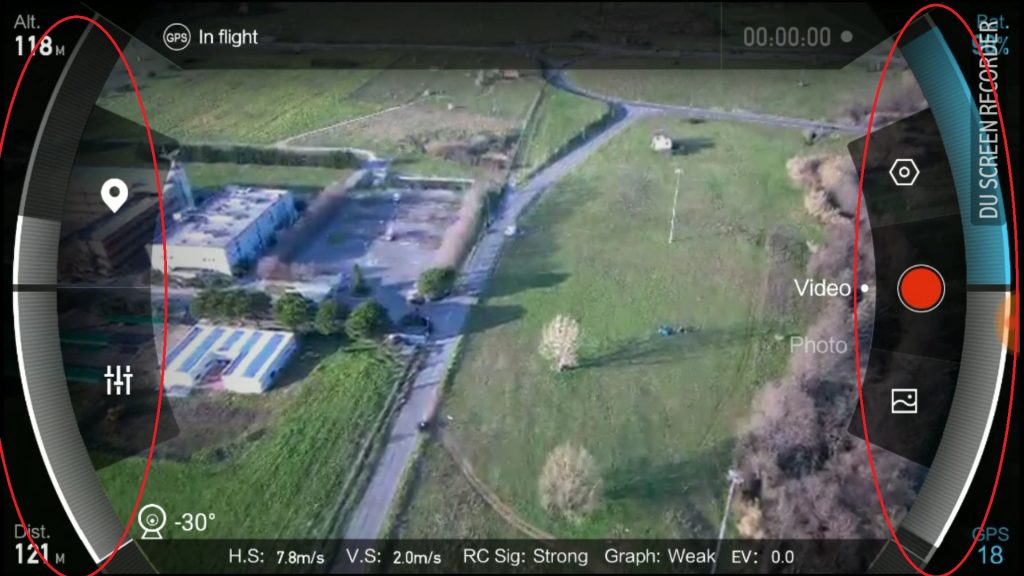
The four bars on the screen edges are graphic presentation of the corners parameters.
On the left side we have the percentages of the top distances we can reach within the actual parameters.
On the right side we have the battery consumption data and the GPS signal quality.
Now let’s examine the 5 touch buttons on the screen.
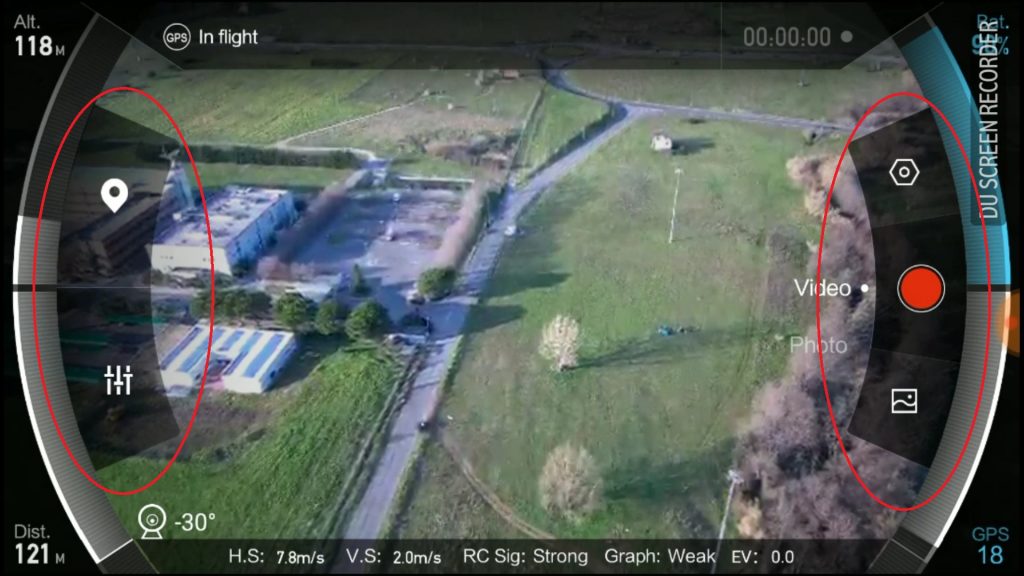
In these screenshots we are in the camera view that allows the pilot to see what the drone sees via the camera. We can switch between this mode and the Maps mode by using the upper left button. The Maps section is where we can see where the drone is geographically located relative to the controller, giving a better idea of the territory and the distances.
Under this button are the camera settings. Here is what we can manipulate:
- EV
- Saturation
- Contrast
- Sharpness
- White Balance
On the right side, we have the Rec/Shoot button and the preview button, where we can see what was previously recorded.

The last button allows the control of other settings and calibrations. There is a section for everything: the Drone section, RC section, Battery section, Gimbal section, Camera section, Map section, and Account section.
Let’s list the content section by section:
Aircraft Section
- Connect Device – It connects the phone to the drone
- Firmware update – It checks if there are any new updates for the drone
- Compass – Used for compass calibration
- Beginner Guide – In this section the app explains to a rookie what to do
- Beginner Mode – With this mode turned on, the pilot has flight restrictions; like 50m (165ft) altitude limit, and 100m (330ft) distance limit from the RC
- GPS mode – Allows the pilot to manually change the max speed, max elevation and other parameters
- VPU Mode – Allows to the pilot to fly the drone only with the sonar – without GPS, including indoors
- ATTI Mode – Allows the pilot to fly the drone without any support
- Show more info – Shows more info on the main screen of the app, like gimbal angle and other parameters
- Imperial Units – On/Off
- IMU – Shows GPS parameters
- Head Light Settings – Change the intensity of the lights
RC Section
- RC Calibration – It allows the pilot to calibrate all the movement of the RC mechanics.
- Stick Mode – It can invert the stick functions.
- WiFi Settings – To change the name and password for the Wifi
- RC Pairing – Starts the connection between the RC and the Drone (binding)
- Right Dial Settings – It changes the function of the wheel on the right corner of the RC
Battery Section
This section shows all battery info, including the temperature of the battery pack
Gimbal Section
- Gimbal Calibration – Auto calibration of the gimbal
- Gimbal Adjustment – Manual adjustment of the gimbal
Camera Section
- Mode – PAL/NTSC
- Video Resolution – 4K @30fps/2.5K @60fps/1080p @ 100/60/30fps
- Photo Size – 4:3 12Mp/16:9 8Mp
- Photo Format – JPEG/JPEG+RAW
- Use Grid – On/Off
- Lights turn off when shooting – On/Off
- Format Card
- Reset all camera settings
Maps Section
- Satellite Map – On/Off
- Enable Coordinate Correction – On/Off
Account
- Flight Record – Total km, minutes and takeoffs
- Flight Log – Every movement of the drone
- Feedback – Send an enquiry to the Support
- Check for updates
- Version Info – Mi Drone V1.3.9.20604
- History message
- Account
Flight Functions
The Xiaomi Mi Drone 4K comes off the production line with these functions:
Take off – The drone makes an automatic takeoff without risks

Land – The drone makes a fully automatic landing by scanning the ground to find the perfect location
RTH – The drone comes back to the pilot and lands automatically

Orbit Flight – With this mode we can set the altitude, speed and the range of a virtual circle around a position on the map to make a perfect 360° circling record.

Dronie Flight – The drone will point the camera at the pilot and then start to fly backwards, creating a great cinematic effect:

Waypoint Flight– The drone will follow a path pre-set from the Map.
Tap-fly Flight – Simply the drone will reach the POI tapped on the Map.
It’s incredible how well these modes work, simple but very effective! Probably the only thing this drone doesn’t have is the “follow me” mode, which is where the drone follows a pre-set object, like someone on a bike. With these modes it is very easy to create really spectacular footage.
Battery Performance
This drone uses a 5000mAh battery, which is sufficient to fly for about 18 – 20 minutes. Obviously this time depends on speed, wind and various other factors. During the flight the Mi drone will automatically warn the pilot when the battery reaches 30%.
The battery can only be charged with its own charger, because it has its own particular plug – incompatible with anything else. A full charge requires about 100 minutes.
Summary
This is one of the best camera drones under $500 that you can purchase. It has everything you need to have fun or to record unforgettable videos and photos. This drone is perfect for every job and for every skill set, from a rookie to professional pilots. The Xiaomi Mi Drone 4K is almost perfect, and excepting the issue regarding the gyroscope bug, I can’t find anything bad, calling it the best buy drone!
I heartily recommend this drone to anyone who wishes to work with a good camera that can fly.
Pro:
- Beautiful Design
- Easy to Set Up
- Very Easy to Fly
- Great Video Quality
- Long RC Range
- Fast Charging Battery
Cons:
- It is not the smallest drone on the market
- On startup it’s slow to connect with the satellites
- Sometimes the app crashes
